OAuth 2.0 Explained (Useful for SC-300, AZ-400 ,AZ-500)
Welcome to our deep dive into the world of OAuth and secure user authentication! Today, we're unpacking the process step-by-step, using the popular travel planning platform TravelBuddy and its integration with Google's authentication services as our example.
What is OAuth?
OAuth is an open-standard authorization protocol or framework that describes how unrelated servers and services can safely allow authenticated access to their assets without actually sharing the initial, related, single logon credential. In simpler terms, it lets you use one service's login for other services without handing out your password.
The TravelBuddy-Google OAuth Flow
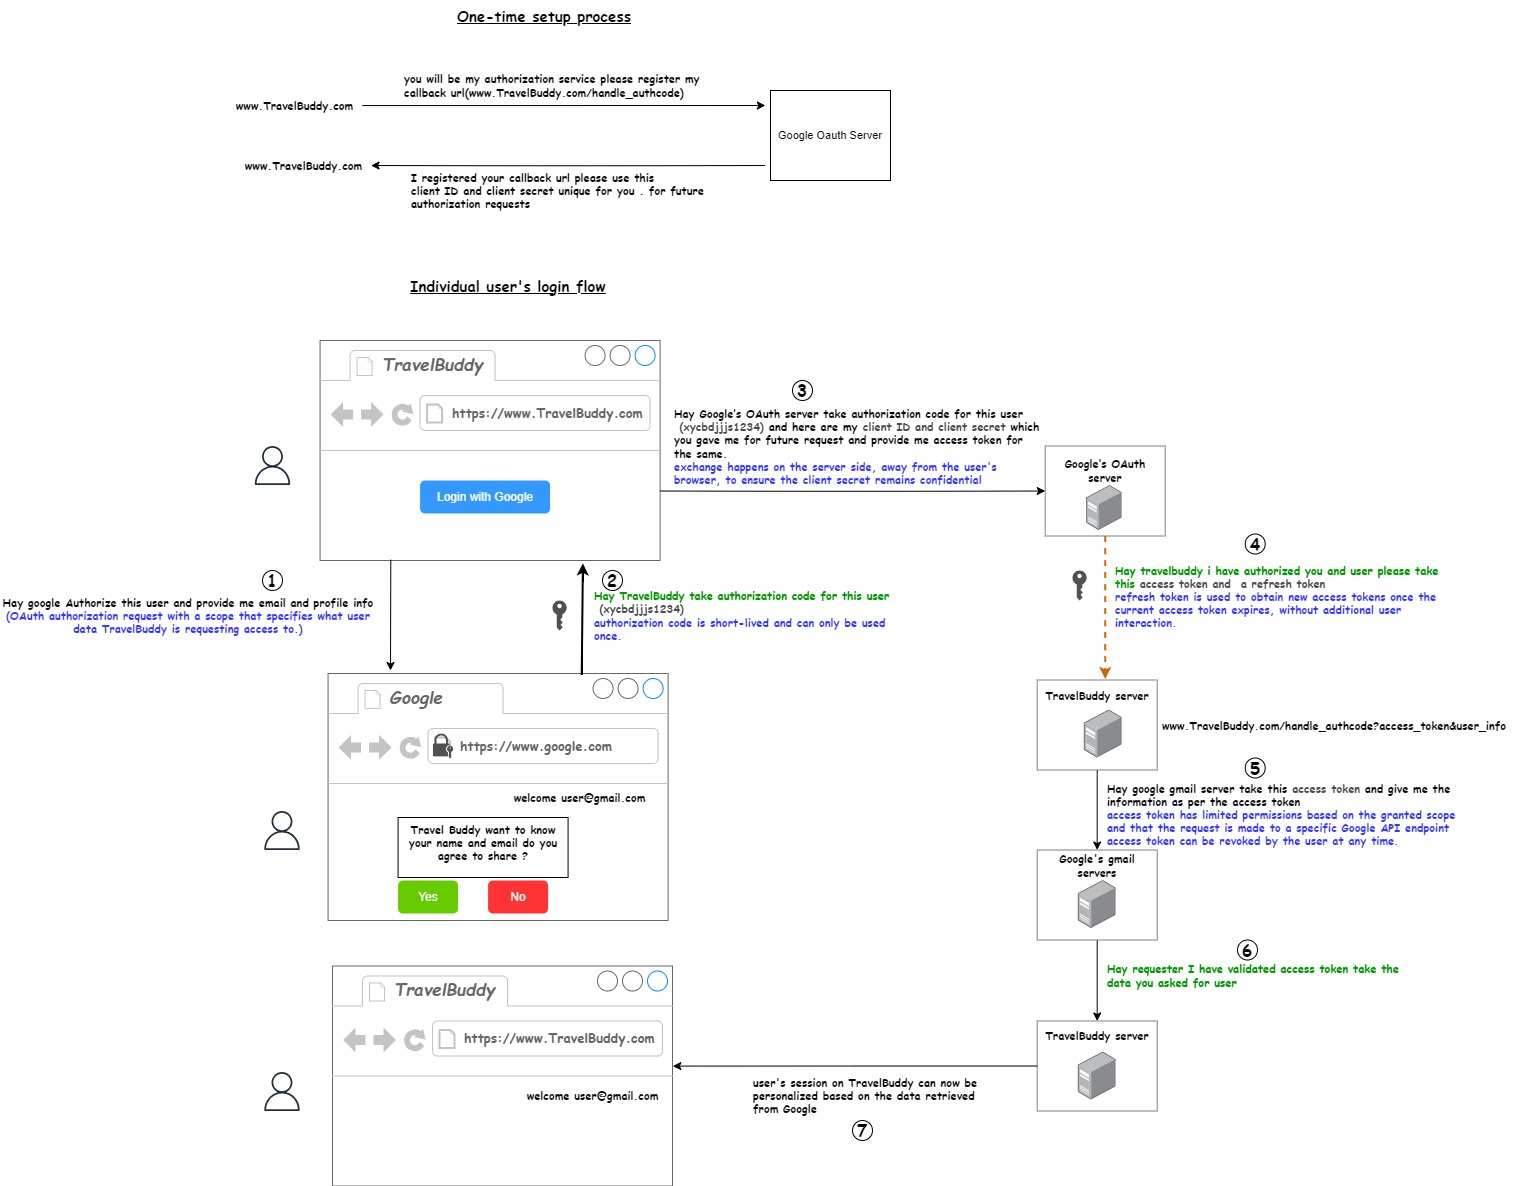
Our journey begins when you decide to use your Google credentials to log into TravelBuddy. But what does that process actually look like? Here’s a visual guide.
Before anything else, TravelBuddy needs to set up a one-time communication channel with Google. This involves registering a callback URL www.TravelBuddy.com/handle_oauthcode with Google's OAuth server, which will be used later in the process to receive an authorization code from Google.
The Login Attempt: You, the user, visit TravelBuddy and click on "Login with Google." It's a simple action for you, but it kickstarts the OAuth flow.
Redirect to Google: TravelBuddy redirects you to Google's OAuth server, asking for your permission to access your email and profile information.
User Consent: At Google, you're welcomed by a familiar login screen. After inputting your credentials, Google displays a consent screen. If you agree, Google sends an authorization code back to TravelBuddy's previously registered callback URL.
Exchange for Tokens: TravelBuddy now takes this authorization code and exchanges it with Google’s OAuth server for an access token and a refresh token. The access token is a temporary key to your Google data, while the refresh token will allow TravelBuddy to request a new access token when the current one expires, without bothering you again.
Accessing Your Data: With the access token in hand, TravelBuddy asks Google for your profile information. Google verifies the token and, upon confirming it's valid, sends the requested data back to TravelBuddy.
Personalized Experience: Finally, TravelBuddy welcomes you back, now with access to your Google data. It can personalize your experience, greet you by name, and make your travel planning process smoother and more integrated.
This process matters because it's a cornerstone of online security. By using OAuth, TravelBuddy ensures that it never sees or stores your Google password. Instead, it receives a limited access token that can only do what you’ve explicitly allowed. It's a win-win: you get easy access to services, and your password stays safe.
Final Thoughts
Understanding OAuth is essential in our interconnected digital world. We hope this visual guide helps clarify the process and emphasizes the importance of using secure authentication methods like the one TravelBuddy employs. Safe travels on the web!

Comments
Post a Comment